
Soil is by far the most popular grooming medium and in many ways the easiest.
In this guide we look at how to fertilise and water your plants in soil.
Newly germinated seedlings
Newly germinated seeds are best started in so-called sowing and pricking out soil or similar mildly fertilised/neutral green soil (such as coco/jiffys).
Normal/heavily fertilized soil is too hard for newly started seedlings. At this stage, their roots are very fine and delicate, and risk being burned by high nutrient levels. This will help to stunt the plant’s growth – and in the worst case cause the seedling to die.
Newly started seedlings need no fertiliser for the first several days.
When the newly started seedlings are transplanted from the “starter pot” (with seed and primer) to a larger pot with soil (e.g. of the “light-mix” type or other fertilised spagnum mixtures), they simply need clean water without fertiliser. This can be pH-adjusted, but it is a minor detail and not a requirement.
In the first 7-10 days, there is plenty of fertilizer in normal soil. After 7-10 days, gradually start introducing fertiliser when watering.


How often should my plants be fertilized?
As mentioned before, newly started seedlings should not be fertilized for the first 7-10 days.
When transplanting them to their “proper” pots, make sure the soil is soaked with clean pH-adjusted water without fertilizer.
Determining whether the pot is sufficiently watered is simple: just lift the pot and feel how heavy it is. After the first big watering, it typically takes 4-5 days before the plant needs more water. The pot should weigh significantly less before watering again.
Overwatering
When growing in soil, it is important not to overwater – the soil must be allowed to dry out between each watering. This ensures that the plant develops a healthy and strong root system, which is essential and the foundation for the plant to absorb enough nutrients and perform at its maximum during the flowering phase of cultivation.
If the soil is always moist, the plant will become “lazy” as it will have no incentive to seek water. It will therefore not spend energy developing a massive root system. You end up with an underdeveloped root system that cannot support the production of large crops later in the flowering phase.
Fertilising – how often?
As a general rule, fertiliser should always be added to the water, but it may also be a good idea to water with pH-adjusted water without fertiliser on a regular basis – for example, once a week. This cleans out the pot and flushes out any excess nutrients, avoiding over-fertilisation, which is not healthy for the plant.
Once the plant has established an extensive root network after a few weeks, you can water with fertiliser 1-2 times a day. This increases production and yield, but it is important that the root network is sufficiently large at this stage and that the plant is able to “eat up” – that is, dry out a little – between each watering. Again; this can be determined by lifting and weighing the pot.
How much water does a plant drink?
Young plants with 1 to 3 sets of leaves need very little water. As mentioned before, it is important that the plants drink up and that the soil is allowed to dry out a little between each watering, as this encourages the plant to develop a larger root system.
- Plants under and up to 1 metre tall, grown in 6-11 litre pots, drink approximately 300-500 mL of water per day.
- Plants with a height of 1 to 1.5 metres typically drink 0.5 to 1 litre of water a day.
- Large plants over 1.5 metres grown in 20 litre pots and above drink about 1-3 litres of water a day.
Please note that the above is only indicative. Factors such as temperature and humidity obviously play a role, and have a major impact on how much a plant drinks and how much evaporation occurs in the pot.

Which pot size should I choose?
It is important that the pot size fits the plant.
Plants do best if the soil is allowed to dry out relatively quickly. This allows for more frequent watering and more efficient fertilizer uptake.
It is therefore a good idea to re-pot regularly as the plant grows larger.
In addition, it is important that the pot has holes in the bottom for drainage of excess water.
For newly started seedlings and cuttings that have just taken root, it is recommended to use small pots with a size of 0.2 to 0.4 litres.
After about 7-10 days you will see the roots of the plant coming out of the drainage holes at the bottom of the pot. It is now time to transplant to a larger pot.
For plants that have a vegetative/gro phase of 3 to 4 weeks before they flower, 11-litre pots are typically a very good size. Once the root network is established and the pot is well filled, the plants can be watered 1-2 times a day. If you find it too much work to water so often, you can increase the pot size to, say, 14-18 litres and then water every 2-3 days.


If the pot does not dry out
If your pots do not dry out after 3-5 days, it is important not to keep giving them more water. Consider whether you have used too large a pot for your plant. the size of the plant. Be patient and give the pot time to dry out.
If you keep watering, you risk overwatering and, in the worst case, the root system will start to rot.
When the pot has finally dried out, you can give it pH-adjusted water with a very mild fertilizer solution – which is typically 1-2 mL of fertilizer per liter of water. In subsequent irrigations, gradually increase the fertiliser according to the manufacturer’s fertiliser instructions.
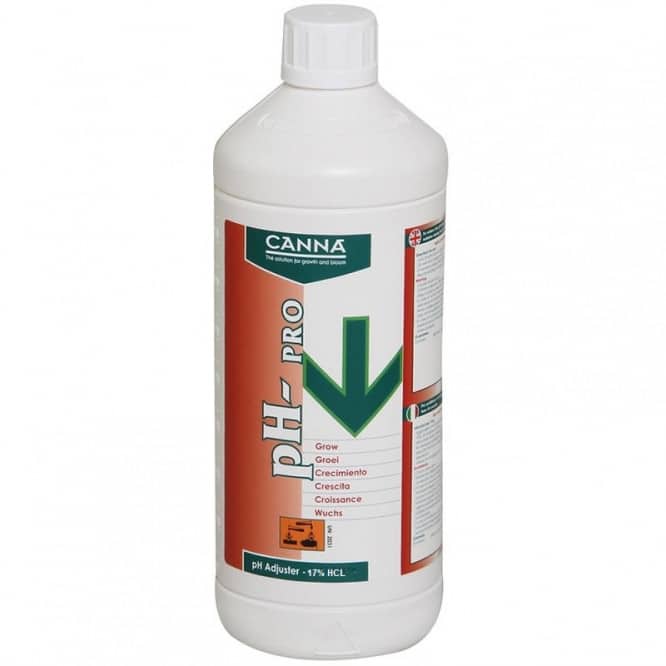
pH adjustment of the fertiliser water?
Many people do not adjust the pH of the fertiliser, and you can achieve good results without pH adjustment, but it is a clear advantage and we recommend that you make the extra effort.
The reason is that the pH of the manure water affects which nutrients are absorbed by the plant. The plant absorbs the individual nutrients in the fertiliser to different degrees depending on the pH value.
The most effective and broadest uptake when growing in soil based on sphagnum is achieved when the fertiliser water has a pH value of about 6.0 to 6.3.

How to adjust the pH of your fertiliser water
You need two things:
- Measuring instrument to measure the pH value
- pH-Down – liquid or powder – to lower the pH
A measuring instrument can be an electronic pH meter. However, these require some maintenance, can break down and cost from around £500 if you want something of good quality, such as Bluelab.
The cheapest and easiest way is to use a pH test kit, which consists of an indicator liquid and a colour scale to assess the pH value.
We ourselves have good experiences with this product from GHE, which is very reliable, easy to use and even inexpensive. It can easily be measured with expensive electronic pH meters. It costs about 50 DKK and there is enough indicator liquid for at least 500 pH tests.
How to use the pH test kit:
- Fill the small tube halfway with water and fertiliser
- Add 2-3 drops of the pH indicator liquid
- Shake and watch the colour change
- Compare with the corresponding colour scale to see the pH value
- The pH value will almost always be too high and must therefore be lowered
- Add an appropriate amount of pH-down and repeat the process until the correct pH value is reached
Easy!
It’s a good idea to use the same measuring cup/jug each time and note exactly how much pH-down you need to hit the correct pH. So you can streamline the process going forward and add pH down straight away, so you only need to take one check measurement for good measure to ensure the optimum pH for your plants.
NB: As the fertiliser affects the pH of the water, always remember to carry out the pH adjustment after the fertiliser has been added to the water and not before.
First fertilize the water, then adjust the pH
.
There are several so-called pH-down products. There are both powder and liquid pH-down and cost between 25 and 80, – kr (and so have many for a long time). What is best depends on personal preference.


…. Extra tips
And finally a few tips…
Yellow leaves
If your plants have light green or yellow leaves, this is a sign that they are under-fertilised.
This typically happens in the vegetative phase or in the middle of the flowering phase (weeks 4-5) because the plants lack nitrogen (also called nitrogen).
Under-fertilisation risks losing your harvest and your yield in the end. Action is therefore needed as soon as possible.
Fortunately, this is easy to correct: all you have to do is turn up the fertiliser a little, which often means 1 extra mL of fertiliser per litre of the relevant fertiliser according to the manufacturer’s fertiliser schedule (e.g. if it says 4 mL/litre, now give 5 mL/litre).
There are many different brands and types of fertiliser, and of course it depends on which fertiliser you use. If you use a powder or pellet-based fertiliser, it’s obviously not the same in practical terms, but the principle is the same.
If you use a multi-component fertiliser (i.e. a fertiliser made up of several individual fertiliser bottles), it is often the one called Part A, Grow or similar that contains the most nitrogen and is the one you need to boost.
If in doubt, contact the manufacturer and ask for their advice before taking any action.
After 1-2 weeks, the plants will start to regain their deep green colour, which means that the plants are cool again.
It may seem like a long time (which is why you need to act quickly when you spot the problem), but that’s how long it takes and it can’t be accelerated. So be patient and trust that the plant will take the treatment well.

Higher returns
As mentioned earlier, the most important thing before the flowering phase is actually everything you can’t see, namely the root system! It is the root system that is the foundation for your plants to achieve maximum flowering and make lots of huge top shoots!
Make sure your plants have plenty of large, healthy roots before they start to flower. If this does not happen, it is difficult to maximise plant yields, even if you do everything right in terms of. care and nurturing.

That said, there is actually a fertiliser you can give during flowering that your plants will love and which will increase yields in the end.
There is no shortage of different fertiliser supplements that promise higher yields etc, but if you have to choose one and only one, it’s the so-called PK booster fertiliser.
A PK booster makes a real difference, and is also relatively affordable. many other fertiliser supplements. It is a supplement we can highly recommend.
Plants are extremely hungry for large amounts of the nutrients P (phosphorus) and K (potassium) in the last part of the flowering phase; and can absorb more than is available in the basic fertiliser.
Adding more PK in the last weeks of flowering is therefore a welcome measure. The flowers will be significantly larger and heavier, and it’s a fertiliser we would always use ourselves.
Most fertiliser ranges have their own version of a PK booster and we would strongly recommend sticking to the same brand as the base fertiliser you use. This way you can be sure that the fertilisers match and you can continue to follow the same fertilisation schedule.


